input[type=”date”]に表示されるカレンダーアイコンを変更する方法をご紹介いたします。
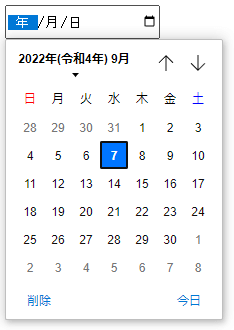
以下のようなフォームを設置した場合、ChromeやEdgeで見るとカレンダーのアイコンが表示されます。
<input type="date" name="date">このようにカレンダーのアイコンが右側に出て、アイコンをクリックするとカレンダーから入力することができます。

このカレンダーのアイコンをオリジナル画像に変更する方法をご紹介いたします。ただし、FirefoxやSafariではそもそもカレンダーアイコンが表示されないので、ChromeとEdge限定の方法です。
input[type=”date”]のカレンダーアイコンを変更する方法
カレンダーのアイコンを変更するには、CSSで調整します。予めico_calendar.svgというカレンダー用の画像を用意しておき、以下のCSSを追加します。
input[type="date"] {
  width: 150px;
  height: 30px;
  position: relative;
}

input[type="date"]::-webkit-calendar-picker-indicator {
  position: absolute;
  top: 0;
  left: 0;
  right: 0;
  bottom: 0;
  width: auto;
  height: auto;
  background: transparent;
  z-index: 1;
}

input[type="date"]::after {
  content: '';
  background-image: url(img/ico_calendar.svg);
  background-repeat: no-repeat;
  background-size: contain;
  background-position: 0 0;
  width: 18px;
  height: 18px;
  position: absolute;
  top: 50%;
  right: 10px;
  transform: translateY(-50%);
}
「::-webkit-calendar-picker-indicator」でデフォルトのアイコンを見えないようにし、併せてカレンダーを展開するクリック領域を広げています。本来はアイコンをクリックしないとカレンダーは展開されませんが、input内のどこをクリックしてもカレンダーが展開されるようになります。
「::after」でオリジナル画像のアイコンを表示しています。
デフォルトと同じ挙動で、アイコン部分をクリックしないとカレンダーが表示されないようにしたい場合は、CSSを以下のようにします。
input[type="date"] {
  width: 150px;
  height: 30px;
  position: relative;
}

input[type="date"]::-webkit-calendar-picker-indicator {
  background: transparent;
  z-index: 1;
}

input[type="date"]::after {
  content: '';
  background-image: url(img/ico_calendar.svg);
  background-repeat: no-repeat;
  background-size: contain;
  background-position: 0 0;
  width: 18px;
  height: 18px;
  position: absolute;
  top: 50%;
  right: 10px;
  transform: translateY(-50%);
}
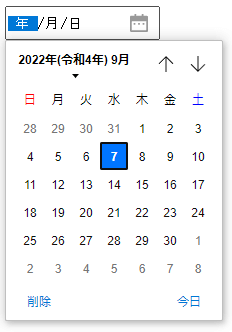
上述したCSSで調整することで、以下のようにカレンダーアイコンが変更されます。

あとがき
input[type=”date”]をフォーム内に設置する場合は、ぜひ参考にしていただければと思います。
コーポレートサイトのお問い合わせフォームでは、日付を入力するケース自体が少ないので、あまり使う場面はないかもですが(^^;


![input[type=”date”]の未入力時に「年/月/日」を非表示にする方法](https://techmemo.biz/wp-content/uploads/2026/01/input_date.jpg)

コメントを残す