Hastyは、WordPressのカスタムメニューやカスタム投稿、カスタムタクソノミー等のコードが生成できるWEBサービスです。各設定項目を埋めていくだけで、functions.phpに記述するためのコードを発行してくれます。
Hastyの使い方
まずはHastyにアクセスします。
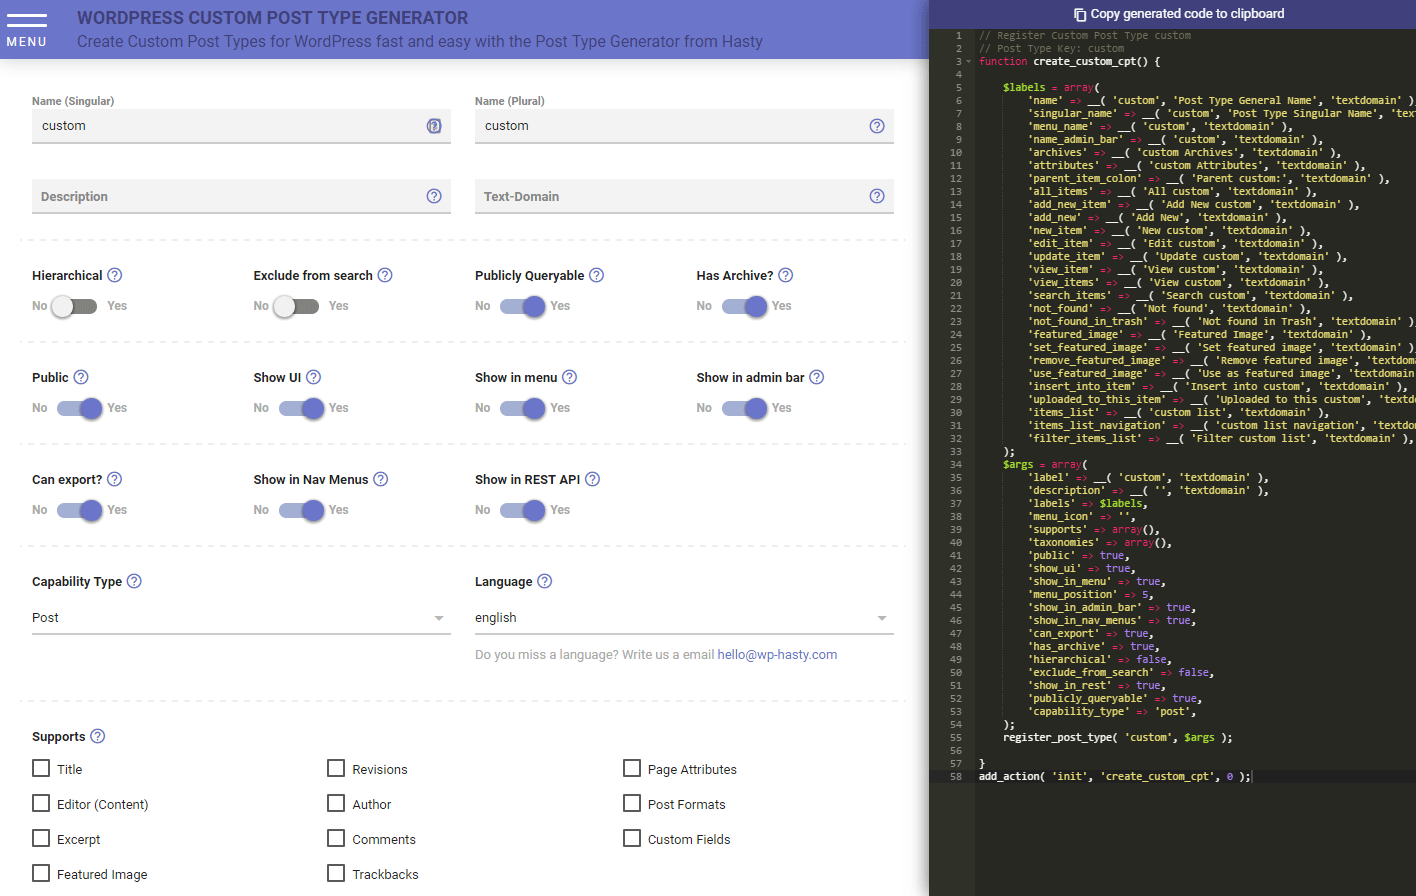
「CHOOSE A MAGIC WORDPRESS GENERATOR FROM HASTY」の中から作成したい項目を選択します。今回はカスタム投稿タイプを選択してみました。

カスタム投稿の名前等、各項目を設定していくと、リアルタイムで右側にコードが表示されます。
設定が完了したら、[COPY GENERATED CODE TO CLIPBOARD]をクリックして、コードをコピーします。
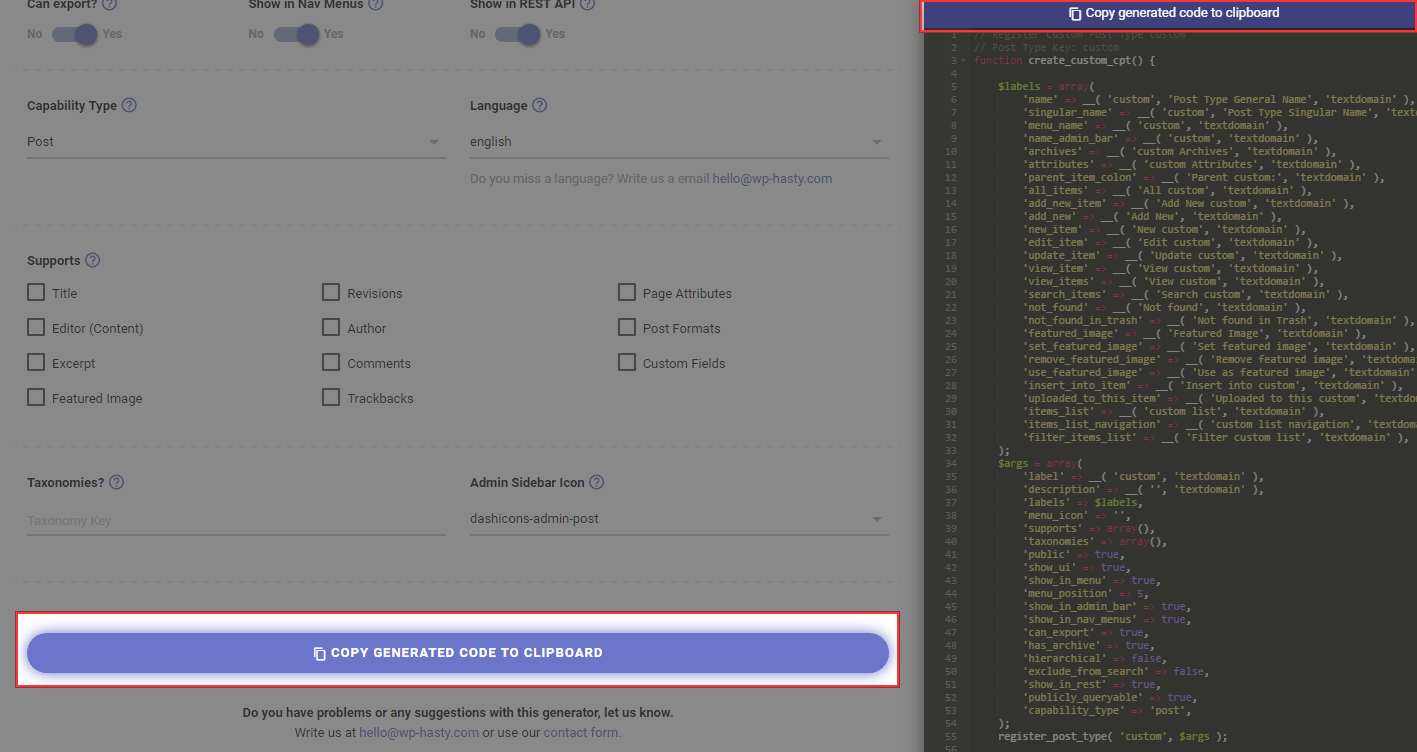
コピーしたコードはfunctions.phpに貼り付けて使用します。ちなみに、カスタム投稿の場合、以下のようなコードが発行されます。
// Register Custom Post Type custom
// Post Type Key: custom
function create_custom_cpt() {

 $labels = array(
 'name' => __( 'custom', 'Post Type General Name', 'textdomain' ),
 'singular_name' => __( 'custom', 'Post Type Singular Name', 'textdomain' ),
 'menu_name' => __( 'custom', 'textdomain' ),
 'name_admin_bar' => __( 'custom', 'textdomain' ),
 'archives' => __( 'custom Archives', 'textdomain' ),
 'attributes' => __( 'custom Attributes', 'textdomain' ),
 'parent_item_colon' => __( 'Parent custom:', 'textdomain' ),
 'all_items' => __( 'All custom', 'textdomain' ),
 'add_new_item' => __( 'Add New custom', 'textdomain' ),
 'add_new' => __( 'Add New', 'textdomain' ),
 'new_item' => __( 'New custom', 'textdomain' ),
 'edit_item' => __( 'Edit custom', 'textdomain' ),
 'update_item' => __( 'Update custom', 'textdomain' ),
 'view_item' => __( 'View custom', 'textdomain' ),
 'view_items' => __( 'View custom', 'textdomain' ),
 'search_items' => __( 'Search custom', 'textdomain' ),
 'not_found' => __( 'Not found', 'textdomain' ),
 'not_found_in_trash' => __( 'Not found in Trash', 'textdomain' ),
 'featured_image' => __( 'Featured Image', 'textdomain' ),
 'set_featured_image' => __( 'Set featured image', 'textdomain' ),
 'remove_featured_image' => __( 'Remove featured image', 'textdomain' ),
 'use_featured_image' => __( 'Use as featured image', 'textdomain' ),
 'insert_into_item' => __( 'Insert into custom', 'textdomain' ),
 'uploaded_to_this_item' => __( 'Uploaded to this custom', 'textdomain' ),
 'items_list' => __( 'custom list', 'textdomain' ),
 'items_list_navigation' => __( 'custom list navigation', 'textdomain' ),
 'filter_items_list' => __( 'Filter custom list', 'textdomain' ),
 );
 $args = array(
 'label' => __( 'custom', 'textdomain' ),
 'description' => __( '', 'textdomain' ),
 'labels' => $labels,
 'menu_icon' => '',
 'supports' => array(),
 'taxonomies' => array(),
 'public' => true,
 'show_ui' => true,
 'show_in_menu' => true,
 'menu_position' => 5,
 'show_in_admin_bar' => true,
 'show_in_nav_menus' => true,
 'can_export' => true,
 'has_archive' => true,
 'hierarchical' => false,
 'exclude_from_search' => false,
 'show_in_rest' => true,
 'publicly_queryable' => true,
 'capability_type' => 'post',
 );
 register_post_type( 'custom', $args );

}
add_action( 'init', 'create_custom_cpt', 0 );
あとがき
カスタム投稿やカスタムタクソノミーは、Custom Post Type UI等のプラグインを使った方が、簡単に作成できます。ですが、もっと細かくカスタマイズしたいという方は、functions.phpにコードを記述して追加しているのではないでしょうか。
一から記述していくと結構面倒なので、ぜひHastyを時短のためにご活用ください。サービス名の通り、すぐにコードを作成することができますよ。


コメントを残す